The first step is to get your domain name and hosting.
Now, if you’re completely new to this whole online thing, let me sum everything up here:
- Domain – The name of your website
- Hosting – The place on the Internet where your website will live
An example I use to make things clearer is to imagine that the brand The Body Shop is a “domain”. The rented shop in a mall where you’ll find The Body Shop is the “hosting.”
In my case, my domain is www.ninjahousewife.com and my hosting is under Bluehost. I like Bluehost because it’s cheap, reliable and you get a free domain when you sign up.
There are tons of hosting companies you can choose from though. But yeah, Bluehost is my go-to.
It’s important to take the time to think about what domain you want, because once you get it, you can’t change it. You can however, get a new one, but then you’d have to pay around $10 for it.
I personally buy domains like how other women buy shoes. I have tons! I’m an addict. Don’t be like me!
STEP 1: CHOOSE YOUR DOMAIN
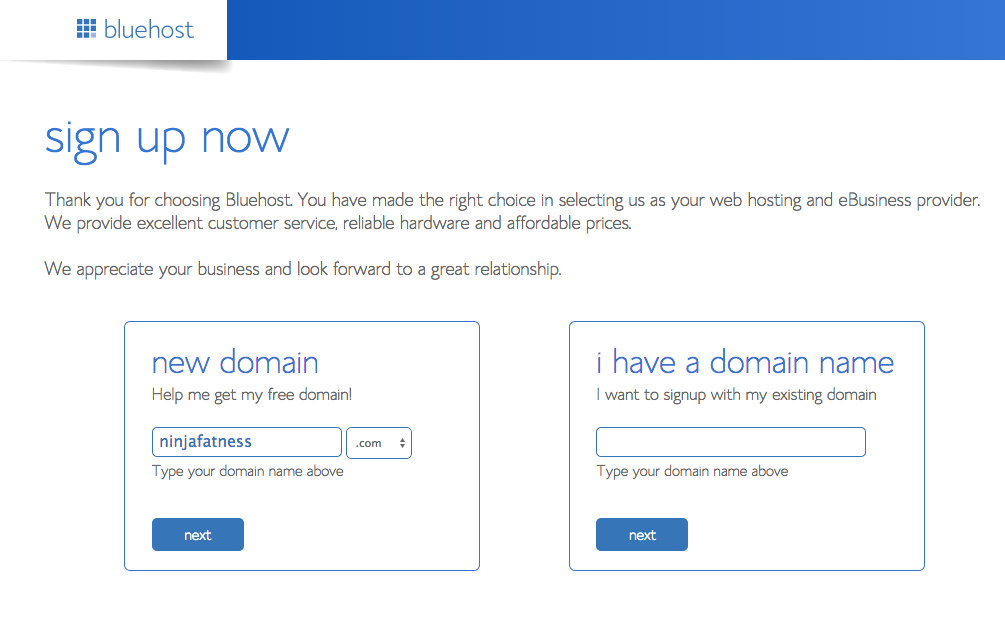
Once you know what you want your domain to be, click here to check if it’s available. Domains have to be unique, so if it’s something common like makemoneyblogging.com it will be taken.
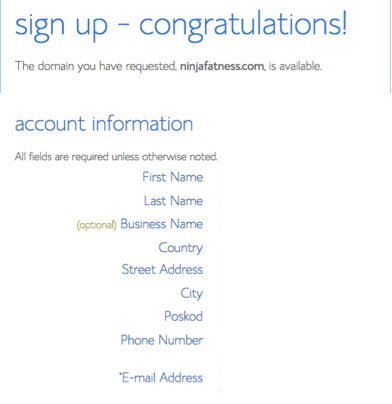
The one I signed up for was www.ninjafatness.com (as you can see in the screenshot below!)
STEP 2: SIGN UP FOR HOSTING
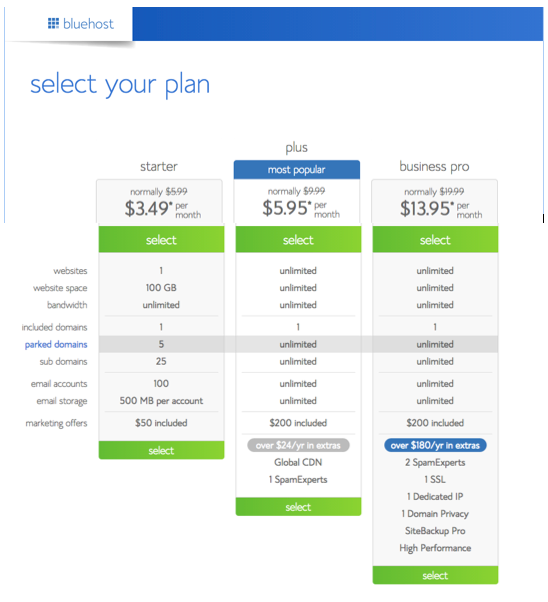
When you have a domain name you like and it’s available, you’ll be brought to this screen where you can choose your payment plan.
Personally I take the “Plus” plan because (as I mentioned previously) I have A LOT of domains. And this plan allows me to host as many domains as I want.
If you’re just starting out, then I suggest you go with the “Starter” plan. It’s an annual fee, but much cheaper in the long run than other hosting companies. Just keep note that you can only host one domain on it 🙂
STEP 3: FILL IN YOUR PARTICULARS
Pretty self-explanatory… Do what’s gotta be done 😛
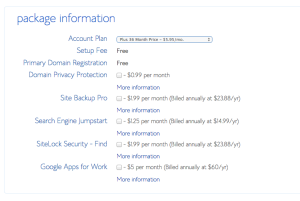
Now when it comes to package information, Bluehost will try to upsell you on as much as they can get. Many people opt to get “Domain Privacy Protection.” That means people can’t find out who you are as the website owner.
Aside from that, I don’t think the rest is necessary. But if you want to get the extras, then by all means do!
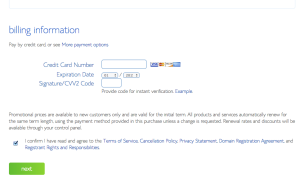
![]() Enter your billing information. Then click on the green “Next” button
Enter your billing information. Then click on the green “Next” button
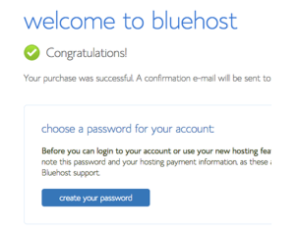
And there you have it!
You’ll see a congratulations page and a confirmation email will be sent to you. Just click on “Create Your Password” to set up your own password and you’re done.

So go ahead and click here to get started with your domain and hosting!
Next I’ll show you how to install WordPress for free so you can start blogging 🙂
Back: Make Money Blogging | Next: Install WordPress
Disclaimer: Please note that some of the links are affiliate links and I will earn a small commission if you purchase through those links. These are companies that I personally use, and I recommend them because I believe they are awesome and I trust them.


